Thursday, May 24, 2012

Feature: "15 North"

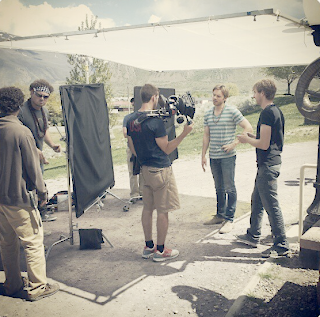
Through the month of April into May I shot a feature called "A Way Around." The last feature I shot was a documentary, so I was pretty excited at the opportunity to once again return to the world of long form narrative. "A way Around" is a road trip movie that chronicles two characters as they travel from LA to Salt Lake City, Utah. The Cannon 5D, being the workhorse of the low budget indie wold, was the directors camera of choice and there was very little wiggle room in the budget for me to suggest otherwise.  I have had mixed feeling about DSLRs from the beginning of their rise around 2009 but I figured this was a good project for me to finally take the plunge and see what the 5D was capable (and not capable) of doing. My friend and fellow D.P Matt Roe had shot a feature previously on the 5D and was a solid resource as I prepped for this one.  I had shot small pieces on DSLRs in the past and was familiar with the 5D but it was still a bit nerve racking to dive right into shooting a feature on one. I knew the limited dynamic range would be one of the biggest issues I would be dealing with so choosing the right picture profile was really important. The good thing about jumping into the world of DSLRs late is that there are a TON of articles/screen tests/comparisons online that millions of other film makers have posted in regards to DSLR film techniques.  Matt had suggested using "Marvels" profile as that was what he used on his 5D feature. I looked at technicolor's profiles as well as "Flaat"and a few others but settled with "Marvels" as it seemed to be a good happy medium. Matt had warned me and I had also read to stay away from overly flat profiles because banding can occur when stretching the waveform while coloring, resulting in loss of information.  "Marvels" lifted the black values slightly without creating an overly flat image. I also used "highlight tone priority" on wide day exterior shots and select shots that I could not control all of the highlights properly. This setting helped retain more information in the highlights without significantly altering the mid tones. It worked well, but I used it sparingly in case it was degrading the image quality at some level.

I knew the other big issue with shooting 5D would be focus. Due to budget constraints, I had very little say as to lens choices and I knew it would be a disaster to pull focus on still lenses no matter what, but it would be even more of a disaster if we didn't choose stops wisely. Again, I spoke with Matt and did some research online and decided that whenever possible, I wouldn't open up the aperture wider than a 4.0.  I also hate the nauseatingly shallow depth of field that has become the trademark of so many indie DSLR shoots. I feel like depth of field is an artistic choice that can help tell the story or draw your attention to different aspects of a frame in varying ways. It seems like so many people out there just think the shallower the better and that seems like such a closed minded way of thinking about it. What's the point of having amazing locations if everything in that location is soft? You can't really create a great composition if the only element in focus is the talent (or 2 inches of the talent at times). AC Mark Rosen was up for the challenge of 1sting on this show, and he did an amazing job.  The B camera almost always wore the 24-105 zoom which we used mainly at the 50 and 85mm focal lengths to match A camera for dueling OTS's.   We shot all the day exteriors around a 4.0-5.6 but it proved to be quite a challenge to light night interiors and even day interiors to a 4.0 with the limited lighting/grip package we had. There were times where we were forced to shoot at a 2.8 due to the complexity of a shot or just the sheer amount of area that would be seen in a wide. I did however notice that with shot compositions that did not include a lot of depth (like two people sitting in bed 6" away from a wall) it made a huge difference to open up to a 2.8 rather than to stay at a 4.0.  Many people had said it was okay to push ISO on the 5D but I had seen some footage shot at ISO 800 and it didn't look so great. I never raised the ISO over 640 on this show.

We used our 1 ton lighting/grip package on "A Way Around".  On the lighting side, it basically included a bunch of Fresnels up to 2k, a few parcans, Lekos and some assorted Kinos. We really pulled off a pretty good looking film with an insanely small amount of lighting/grip gear. Jeff Marlowe came on board as gaffer on the show and he did a great job. We were really understaffed and "undergeared" and to pull off some of the shots that we did was pretty awesome. One of the biggest challenges of this feature was that director Aaron Fradkin wanted to double cover every scene due to the improvisational nature of the script. This made it extremely difficult to light as we had to light both sides of a conversation at the same time, meaning that almost no fixtures could be placed on the ground unless they were far enough away from the talent so that neither camera would pick them up. When we had the space, we keyed with a 2k Fresnel through 6x6 light grid so that the key could spread and reach both subjects at the same time. The problem was, it could not be wrapped properly on both subjects at the same time and it was difficult to place a fill light because it would be seen by one camera or the other. We almost always flew a back light way out high on a menace arm as to not be seen by either camera. The back light situation was a bit tough as well because it may look great on one subject from one direction, but it would spill unpleasantly onto the other subject in the opposite direction. We solved this by making the back lights a bit more toppy than I usually make them, in order to avoid spill on opposing subjects. In some cases we were forced to live with not so perfect lighting on both subjects but it was more important to Aaron to have double coverage for editing than to have lighting perfect so it was a sacrifice Jeff and I had to make. I was most proud of a night interior bar set up in which we had to light 5 people that were being double covered from opposing angles (An early version of the setup is ABOVE LEFT).  When finished, we ended up keying with a 44 kino on a menace arm swung way out high over the bar and filled with another low 44 kino under the bar. We also had (2) tweenies on baby off set arms on dimmers for backlights that played as flickering bar TV's. We punched a parcan into the ceiling in the background to raise the ambiance behind the subjects and then we had another tweenie raking across a bunch of glass bottles in the foreground. We did a lot of color temp mixing on each of the fixtures and it looked awesome. I still don't know how we were able to frame out the fixtures for double coverage but somehow we did and it looked pretty good.

          Overall I was happy with the result and I think "A Way Around" has a lot of potential. I'm curious to see how it's shaping up in the edit. We really pulled off something amazing. The locations were gorgeous and it was a small but awesome crew who I plan on working with more and more in the future. I learned a lot in the 18+ days of shooting and I would say my first true dive into DSLR shooting was a success. I came to the conclusion that the 5D is a great low budget option, it just takes a lot of hard work to bring everything within the constraints of it's limited dynamic range. If you have the right tools and the right amount of time to do this, you can make a 5D image look pretty similar to an image from one of the big guns.

Monday, February 20, 2012

Music Video: Jason Mraz "I Won't Give Up


___In January, I gaffed a music video for Jason Mraz called, "I wont Give Up." I worked closely once again with Director/D.P Matt Roe (http://matroe.com/). We have worked together on numerous projects in the past but the stakes were raised a bit on this one as it was our first collaboration under the direction of Mark Pellington (http://www.imdb.com/name/nm0671210/). Mark has directed some amazing projects in the past and I was excited for the chance to finally work with him. We scouted two main locations that would be used for both performance and "story" takes. I use the term "story" loosely because the concept for the video doesn't involve a true narrative element, but rather a combination of powerful images for the viewer to interpret/see/digest/feel. I like this concept a lot because it allows people to watch the video and then develop their own individual interpretation of it based on how the images make them feel.

The first location was a very old house and it's surrounding property. I could tell on the scout that it had a ton of cinematic potential. It featured rusty old furniture, broken down cars, overgrown trees and bushes that twisted into tunnel like semi circles. I knew the location had a ton of history and I felt like I was walking around on egg shells the whole time because I didn't want to disturb any memories that had been created and preserved there for so long. I think I whispered the entire time for that same reason. It's hard to pin point exactly how it made you feel to walk around there, but for me I think it was mostly a feeling of wonder. I wondered about who lived there and the experiences they had. I wondered what their story was. As soon as I saw the people who had been cast and the faces that would be placed in that environment I knew it was going to make for some powerful images. Each face had so such character. I wondered about the people that were cast the same way I wondered about the house and the property.

The shots we got in that location looked amazing and were perfect for the song in my opinion. To me the song is about perseverance. It's about staying strong and fighting for what/who you want or believe in no matter what. I think all of the faces were perfect because you look at them and you can tell that they have been through a lot. You immediately connect the themes of the song to those faces and you start to imagine a story for each of them. They have all undoubtedly been through a lot and they "didn't give up." They are still here and "it was worth it." I also liked the way the little boy and the baby were incorporated into the cut because they bring a sense of time and depth to the piece. It's an amazing contrast to go from the boy's innocent/unsure and exploitative look to the confident/proud weathered look of the older people.


___The second location was a giant rock quarry where we focused on more people/faces and the performance. I think this location worked well because the towering piles of loose gravel rocks and dusty atmosphere reinforced the themes of hard work/persistence and staying strong. One image that made the cut and really sticks out for me in this location is the wide shot of a policemen on top of a gravel pile looking down at a slightly wrinkled American flag. We used an Ageeba (powerful smoke machine) to create billows of smoke that curled up and over the rock piles. (ABOVE LEFT) We also used it in the first location in the early morning and it looked amazing because it gave shape to the rays of sun that were spilling in through the tree branches. (ABOVE RIGHT) We shot the performance takes at the rock quarry with a ton of smoke at sunset which gave the smoke an orange/pink hue that was further enhanced in the color grade.

I learned a lot on this shoot, not from a technical standpoint but more from an emotional one. The fact that I have written this entire post without mentioning a single technical aspect of the shoot on either the camera or lighting/grip side is shocking. Watching Mark and Matt work really opened my eyes to a different kind of shooting. Both of those guys shoot heavily based on instinct and emotion and they like to shoot what feels right immediately. This was a shooting environment unlike any I have ever experienced and although overwhelming at first, it really was amazing. Mark is all about connecting with the actors to get the performances he needs. There were even some takes where he would be operating the camera with one hand while holding the actors hand with the other. That's pretty amazing. Mark doesn't really like lighting and grip equipment (I'm assuming because he feels limited and confined by it) and it definitely clashes with his shooting style. I learned on this shoot that sometimes it's less about making every shot aesthetically pleasing and more about capturing the right emotion. There is definitely a delicate balance there. Matt shared with me a piece of advice Mark gave him once a while back which was, "Shoot more with your heart and less with your head." I'll be remembering that from now on.

Saturday, January 7, 2012

Commercial: "Cliffside Malibu"


___At the end of November I shot a commercial for a drug rehabilitation center called Cliffside Malibu. It was only a one day shoot in which we had to capture 3 interview set ups as well as various b-roll of people interacting on the property. The biggest challenge on this job was getting everything done before sundown, which in late November, was at 4:45 PM. Myself and Director Matt Rowe knew this would be the biggest challenge as we scouted the location the week before. The Clinic was located in the hills of Malibu with a gorgeous view of the surrounding valley and ocean. I could have shot there for 3 days and not covered everything I wanted to on the property. Matt and I broke down the coverage based on the clients boards and scheduled the set ups in a way that made the most sense based on the position of the sun throughout the day. I also made a detailed list of the lighting fixtures and grip equipment that would be used on each set up so that the G&E guys could be one step ahead of Matt and myself at all times. We knew this was the only way we had any shot of getting everything in the can before sundown.

We shot on two Sony F3's with RED Zooms. During the interview setups, our A Camera was always on sticks while our B Camera floated off key side on a slider. For the interior interview setup we keyed with a book light (1.2 HMI into a bounce board back through a 6x6 frame of light grid with siders). For a back-light we used a 22 Kino on a menace arm. On the fill side we just flew in a bounce board to get some return from the key. The key was relatively frontal anyway as the client was looking for a soft, even feel for the whole piece. We also used a Joleko to put a slash and or window pattern on various background elements. We then covered various windows and doors with double net to take the natural sunlight down a stop outside and gain a bit more detail back in the windows. We were really testing the dynamic range on the F3's all day, which was something I was concerned about because I knew from the scout that we would be dealing with areas of extremely high contrast. NDing the windows would have helped us a lot but we just didn't have the time or personnel to make that happen efficiently enough with our schedule.

For the b-roll shots of people interacting on the property and surrounding landscape our A Camera was almost always on a jib while our b-camera was on a slider. It was important to us that the camera always be in motion to add the the pieces relaxed, serene feel. For exteriors that were not extremely wide, we were able to sneak in a mirror board through a 4x4 frame of 250 to add an edge or to fill in faces here and there. We also used a 12x12 frame of 1/2 soft frost to knock down the harsh sunlight on some tighter exteriors. By the end of the day, we were so pressed for time that Matt and I broke off into two separate units to take full advantage of golden hour. Overall it was a great shoot and the final spots are looking good.

Monday, November 28, 2011

Short: "Cheat Day"


___In the middle of November I worked as a Gaffer on a short called "Cheat Day." Friend and fellow D.P Jess Dunlap was shooting and asked me to come on board as Gaffer. We were shooting on the RED MX and working with a small G&E package but it was enough to get the job done. For the interiors we keyed through a big window with a 1.2 HMI through a 8x8 light grid with a 4x4 250 in between the fixture and the big frame to soften the light even more. We filled with either 44 kinos or 24 kinos through 4x4 frames of 250 or opal. We also used a joleko bounced into a small bounce card a lot to create subtle back edges or even provide fill in small hallway areas where it was impossible to squeeze a fixture in.

We had one pretty big exterior setup that consisted of a model walking down a red carpet up to the front steps of the house. We bounced a 1.2 HMI into a big bounce board off camera left for general ambiance/key. We then set up four Lekos. Two played in frame as part of the red carpet scene while two others were just off camera creating two edge lights, one on each side of the models hair. We then positioned the Joleko off camera right and had an electric pan the light back and forth to flare the lens during the shot. We shot it at 120 FPS while dollying through the doorway towards the model and red carpet outside. Playback looked pretty awesome with the flares and smoke.

One SFX shot included mounting the RED to a remote head so that a motion controlled 360 degree pan of a bedroom could be captured. We lit the room by placing two frames of 250 tight to the two windows outside the room and shot an 800w Joker through one and two 44 kinos through another. We couldn't really put any other fixtures inside the room because everything was seen in the 360 degree pan. I didn't get a chance to see playback on this shot but I'm interested to see how it came out. Overall it was a good shoot with good people. Jess was one of the only people I knew on set but it was cool to work with some new faces. Hopefully we will continue to work together in the future.

Sunday, November 13, 2011

Short: "Rays Of Darkness"


___In the middle of October I shot a short called "Rays of Darkness." I was pretty excited to be hired to D.P this job because I knew the director was looking for a dramatic low key look and that it would be fun to light. We shot on the RED with a set of CP2 lenses. I rated the camera at 320 ISO most of the shoot but there were a few scenes that I pushed it to 640. I was concerned about doing so at first but looking at the dailies after the fact I actually like the slight graininess of the scenes shot at 640 better than the footage that was shot at 320. It definitely adds a grittiness that fits well with the look of the piece. We used our 1 Ton lighting/grip package on this gig as well. This was the first shoot I've D.P'd that consisted of sets as opposed to practical locations. It was definitely challenging because obviously every light had to be placed and created without looking fake or unnatural. It was a lot different than working in a practical location where you would be augmenting and or adding to the existing light. It was fun in the fact that it was like starting with a blank pallet every shot but it was challenging because it was tough to make each light feel and look natural.

One of the lighting set ups that I was most proud of was in a "morgue" set complete with real body slabs. (TOP LEFT) Gaffer John Hafner and Key Grip Jeff Marlowe were able to have a decent amount of time to pre-light and it definitely payed off. They did a great job. We had spoken about the morgue set earlier and that I wanted it to have a green feel off in the background but I wanted the key to feel a bit more neutral. The mix in color temperatures really looked great, the green background with a slightly more neutral key and fill. We ended up gelling the recessed practical lights with green gels to light the background and then a 750w par was rigged to the ceiling pointing straight down bouncing into a silver operating table. This provided a key for the actors in the middle ground as they stood around the table. The par created a really cool hot spot on the silver table that was motivated by a crazy circular"operating lamp" visible in the frame. The "operating lamp" also provided a nice back light for the actors on the right side of frame. We then added a big CFL softbox to help raise the light level in the foreground as well as add some fill to the actors in the middle ground. The only other small tweaks we made were adding another floor practical lamp to the background to balance out the frame on the left side and then flew in a 1x1 light panel to key the actress as she moved closer to the foreground later on in the scene. We added some haze to the scene as well which looked great.

1st A.C Austin Ahlborg did a great job all around as well. There were a lot of hand-held scenes in the short and they were definitely challenging to pull. It was really one of those deals where I just had to feel out the scene and go with the flow as I was operating and he just adapted well on the fly. I learned quick that the RED fully decked out with two on board monitors, hard drive, brick, matte-box etc. was not easy to shoulder for long periods of time but It it all worked out. We shot about 12 pages in two days. It was stressful at times and we were rushed at points but I think all things considered the footage looks great.

Friday, September 9, 2011

Feature: "Love's Christmas Journey"


___At the end of August I worked as an assistant camera on a feature for the Hallmark channel called, "Love's Christmas Journey." It will be a total of a 40-day shoot that will make up a two part mini-series set to air around Christmas. This was a really cool shoot to work on for a ton of reasons; one being that it was my first Western. We started shooting at Melody Ranch which had a huge exterior western set complete with sheriff’s office, general store, saloon and more. We were shooting on 2 "Panavised" RED MX's, which was awesome. (ABOVE RIGHT) Panavision buys RED bodies and modifies them so they can be outfitted completely with Panavision accessories. The standard PL mount is removed from the RED body and a special mount is attached to fit the Panavision PRIMO ZOOMS that are used on both cameras. Panavision also developed a power box that bypasses RED's power system and allows the camera to be powered off two sources simultaneously. On set, the cameras are powered off a set of Dionic batteries, which mount to the top rail system, as well as a big lead Panavision block battery. The camera runs off block battery power while we are on sticks shooting, and then when we have to move the camera to a different set up, we switch to the Dionic power source. It's a really great system that is quick and easy and it allows us to run the camera constantly on set without powering down. The “panavised” RED’s also feature a side rail system for the swing away matte box, Panavision’s microforce zoom control and a bunch of other sweet Panavision accessories.


Over the course of the 7 days I was on the project, we shot some really awesome stuff including a small fight scene and a scene in which a barn goes up in flames. (LEFT) The D.P, Maximo Munzi, uplit a lot of the scenes in the film using “covered wagons.” They were pretty simple home made lights made up of 6 practicals on a 2x4 with chicken wire and light grid wrapped around the globes in a semi-circle. He placed them on the ground and used them as fill and even key at times. Mostly all of the smaller tungsten sources as well as any HMI lights that flew were outfitted with soft boxes and grids or shot through 4x4 frames of diff. He rarely ever used a hard source. For night exteriors we had a condor with two Maxibrutes shooting through 4x4 frames of opal or other diffusion. This was used mostly as a moonlight ambient source. He used 4x4 frames of double net to control light coming from broad sources at times, which was pretty cool. For day exteriors he used some powerful HMI’s as fill or table topped a 12x12 rag of ¼ silk or similar to soften the harsh overhead sunlight. He also used an ultra-bounce a lot as well. Overall it was a great shoot with a fun crew. I hope to continue working for Hallmark as I really like everyone in the camera and G/E department. I learned a lot about Panavision accessories and it was nice to work with some higher end camera equipment.

Wednesday, August 24, 2011

Commercial: "LA Weightloss"


___In the middle of August I worked as a swing grip/electric on a commercial shoot for LA Weightloss. We were working off of the 5 ton truck at this amazing house in Malibu high in the hills. It was a pretty small crew but we still got some great looking shots. One of the setups was in a bathroom that had two big windows that looked out into the canyon below. The D.P wanted to retain the detail outside in order to see the canyon so he stopped down a lot. This meant we had to blast the bathroom with light in order to get the exposure inside close to the same stop as the exposure outside. We blasted two 1.2 HMI's through a 4x4 frame of 250 for a key, then bounced a 2k mighty into the ceiling to raise the ambient level. We floated a 2 foot 2 bank Kino around for fill as well. We also used various Lekos as specials to accent certain background elements like cabinets or the bathtub. We used a mirror board outside and reflected it in through a window off screen to up the light level in the background as well. It was really tough to raise the light level inside the bathroom to match the light level outside in the canyon but in the end the image looked great despite the insane amount light we had to pump into such a small space.

A couple other setups were in the kitchen in which giant sliding glass doors were visible in the background of the shot. The D.P wanted to once again retain the detail outside in order to see the infinity pool, canyon and ocean backdrop. Instead of trying to blast the whole kitchen with light, we spent a lot of time cutting rolls of ND6 and carefully taping them over all the sliding glass doors. This brought the outside light level down two stops so it was a lot easier to match that light level in the kitchen. We used a 1.2 HMI through a 4x4 frame of 250 for key and two Image 80's for fill and ambient. The image 80's are nice lights for pretty pieces because they are a big soft source and really fill in shadows nicely. The last few setups of the day were outside in the pool. We used mirror boards through 4x4 frames of 250 and opal as key and an 8x8 ultrabounce for fill. We also used mirror boards to accent certain spots in the water behind the talent. Overall it was a solid day and because it was a small crew I had a lot more responsibility in terms of gear. I'm really getting to know this 5 ton truck and am starting to feel comfortable with all the equipment and how it is stored. A couple more gigs on this truck and I'll be even more confident with all the gear.