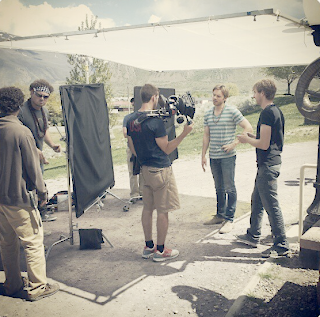
Through the month of April into May I shot a feature called "A Way Around." The last feature I shot was a documentary, so I was pretty excited at the opportunity to once again return to the world of long form narrative. "A way Around" is a road trip movie that chronicles two characters as they travel from LA to Salt Lake City, Utah. The Cannon 5D, being the workhorse of the low budget indie wold, was the directors camera of choice and there was very little wiggle room in the budget for me to suggest otherwise. I have had mixed feeling about DSLRs from the beginning of their rise around 2009 but I figured this was a good project for me to finally take the plunge and see what the 5D was capable (and not capable) of doing. My friend and fellow D.P Matt Roe had shot a feature previously on the 5D and was a solid resource as I prepped for this one. I had shot small pieces on DSLRs in the past and was familiar with the 5D but it was still a bit nerve racking to dive right into shooting a feature on one. I knew the limited dynamic range would be one of the biggest issues I would be dealing with so choosing the right picture profile was really important. The good thing about jumping into the world of DSLRs late is that there are a TON of articles/screen tests/comparisons online that millions of other film makers have posted in regards to DSLR film techniques. Matt had suggested using "Marvels" profile as that was what he used on his 5D feature. I looked at technicolor's profiles as well as "Flaat"and a few others but settled with "Marvels" as it seemed to be a good happy medium. Matt had warned me and I had also read to stay away from overly flat profiles because banding can occur when stretching the waveform while coloring, resulting in loss of information. "Marvels" lifted the black values slightly without creating an overly flat image. I also used "highlight tone priority" on wide day exterior shots and select shots that I could not control all of the highlights properly. This setting helped retain more information in the highlights without significantly altering the mid tones. It worked well, but I used it sparingly in case it was degrading the image quality at some level.

I knew the other big issue with shooting 5D would be focus. Due to budget constraints, I had very little say as to lens choices and I knew it would be a disaster to pull focus on still lenses no matter what, but it would be even more of a disaster if we didn't choose stops wisely. Again, I spoke with Matt and did some research online and decided that whenever possible, I wouldn't open up the aperture wider than a 4.0. I also hate the nauseatingly shallow depth of field that has become the trademark of so many indie DSLR shoots. I feel like depth of field is an artistic choice that can help tell the story or draw your attention to different aspects of a frame in varying ways. It seems like so many people out there just think the shallower the better and that seems like such a closed minded way of thinking about it. What's the point of having amazing locations if everything in that location is soft? You can't really create a great composition if the only element in focus is the talent (or 2 inches of the talent at times). AC Mark Rosen was up for the challenge of 1sting on this show, and he did an amazing job. The B camera almost always wore the 24-105 zoom which we used mainly at the 50 and 85mm focal lengths to match A camera for dueling OTS's. We shot all the day exteriors around a 4.0-5.6 but it proved to be quite a challenge to light night interiors and even day interiors to a 4.0 with the limited lighting/grip package we had. There were times where we were forced to shoot at a 2.8 due to the complexity of a shot or just the sheer amount of area that would be seen in a wide. I did however notice that with shot compositions that did not include a lot of depth (like two people sitting in bed 6" away from a wall) it made a huge difference to open up to a 2.8 rather than to stay at a 4.0. Many people had said it was okay to push ISO on the 5D but I had seen some footage shot at ISO 800 and it didn't look so great. I never raised the ISO over 640 on this show.

We used our 1 ton lighting/grip package on "A Way Around". On the lighting side, it basically included a bunch of Fresnels up to 2k, a few parcans, Lekos and some assorted Kinos. We really pulled off a pretty good looking film with an insanely small amount of lighting/grip gear. Jeff Marlowe came on board as gaffer on the show and he did a great job. We were really understaffed and "undergeared" and to pull off some of the shots that we did was pretty awesome. One of the biggest challenges of this feature was that director Aaron Fradkin wanted to double cover every scene due to the improvisational nature of the script. This made it extremely difficult to light as we had to light both sides of a conversation at the same time, meaning that almost no fixtures could be placed on the ground unless they were far enough away from the talent so that neither camera would pick them up. When we had the space, we keyed with a 2k Fresnel through 6x6 light grid so that the key could spread and reach both subjects at the same time. The problem was, it could not be wrapped properly on both subjects at the same time and it was difficult to place a fill light because it would be seen by one camera or the other. We almost always flew a back light way out high on a menace arm as to not be seen by either camera. The back light situation was a bit tough as well because it may look great on one subject from one direction, but it would spill unpleasantly onto the other subject in the opposite direction. We solved this by making the back lights a bit more toppy than I usually make them, in order to avoid spill on opposing subjects. In some cases we were forced to live with not so perfect lighting on both subjects but it was more important to Aaron to have double coverage for editing than to have lighting perfect so it was a sacrifice Jeff and I had to make. I was most proud of a night interior bar set up in which we had to light 5 people that were being double covered from opposing angles (An early version of the setup is ABOVE LEFT). When finished, we ended up keying with a 44 kino on a menace arm swung way out high over the bar and filled with another low 44 kino under the bar. We also had (2) tweenies on baby off set arms on dimmers for backlights that played as flickering bar TV's. We punched a parcan into the ceiling in the background to raise the ambiance behind the subjects and then we had another tweenie raking across a bunch of glass bottles in the foreground. We did a lot of color temp mixing on each of the fixtures and it looked awesome. I still don't know how we were able to frame out the fixtures for double coverage but somehow we did and it looked pretty good.
Overall I was happy with the result and I think "A Way Around" has a lot of potential. I'm curious to see how it's shaping up in the edit. We really pulled off something amazing. The locations were gorgeous and it was a small but awesome crew who I plan on working with more and more in the future. I learned a lot in the 18+ days of shooting and I would say my first true dive into DSLR shooting was a success. I came to the conclusion that the 5D is a great low budget option, it just takes a lot of hard work to bring everything within the constraints of it's limited dynamic range. If you have the right tools and the right amount of time to do this, you can make a 5D image look pretty similar to an image from one of the big guns.


 I recently returned from a 30 day shoot in Japan for the U.S. Soccer Federation. I have worked as a freelancer for them for a few years now and it has been a great opportunity to travel and shoot in places all over the world. I shoot training session/games and interviews with players/coaches and any excursions the team may go on during off days. On this trip I shot at the Hiroshima Memorial, the U.S Ambassador's residence and the Tsunami disaster zone in Sendai. These were pretty eye opening experiences and it was great to be able to capture the teams reaction as they visited each site. It's interesting to go back to the world of ENG style shooting when I'm with the U.S Soccer Federation as so much of what I normally shoot and work on in LA is with cinema camera systems. I shoot on the Panasonic HPX250, which is cool because I can see how far Panasonic has come with this line as the very first HD camera I used back in 2004 was the HVX200. They have way more inputs/outputs now, including HDMI and firewire 400 which I use for live capture. It also has a waveform monitor built in and it's a lot easier/quicker to shoot variable frame rates. The HPX250 also shoots in AVCINTRA which is a relatively new codec for Panasonic and it's been fun figuring out that post workflow.
  The other thing that's interesting about returning to the world of ENG style shooting is having to deal with harsh lighting conditions with no grip/electric equipment to shape/control light. It's always important to chose the best location to place your subject based on the direction of the sun, but it makes it even more important when you have no way to control it or add any additional sources. I found that the best thing to do for shooting interviews in harsh sunlight during mid day is to place the subject so that the sun is at their back, creating a hard edge on their shoulders and hair. This way the sun is not creating harsh shadows under the eyes and the subject is not squinting into the sun during the course of the interview. It's tough to control highlights with these cameras but I found that if you have to, you can let the back edge light blow out a bit in order to get proper exposure on the face and then with a little color correction you can bring the highlights down and push the mids up a bit. This actually softens or "smooths" out the image and I found that it looks good when shooting women. It definitely takes away some contrast when you do this, but if you bring the blacks down a bit after it helps add more. Another challenge was that because in Japan the frequency of electric current is 50 hertz as opposed to 60 hertz like in the U.S, I could not shoot at a 1/60th shutter or else the lights would flicker really bad. I chose to shoot at 1/100th as that was the best option that would put the shutter in sync with the 50 hrtz frequency. It was a little annoying because then I needed to push the gain to compensate for the light loss with a sharper shutter but better that than giant strobing lines across the frame.
  Recently I shot a short called "Snag." It was a 4 day shoot that took place primarily in Hermosa Beach. We shot on EPIC, which was really nice, especially after coming off a feature shot on 5D. It was amazing to look at the waveform and not see it completely stretched on every shot. I got so used to how the waveform looked when shooting with a 5D that I forgot what it was like to shoot with a camera that has some real dynamic range. I remember one shot where we were shooting 3 subjects who were back lit by the setting sun with the ocean way off in the distance. I looked at the image and thought there was no way we were going to retain the detail in the sky/water while still getting proper exposure on the faces. All we brought in was an 8x8 ultra bounce and we were able to get good exposure on the faces while still retaining detail in the water/sky. I looked at the waveform and there was nothing clipping at all, which was amazing. There was no way that would have happened on a DSLR. One of the main shooting locations was a laundry mat in Hermosa (ABOVE LEFT). The scenes in the laundry mat had a ton of characters involved and blocking was heavy. Lighting was a bit of a challenge as the entire place was lit with florescents that we were unable to switch out due to time constraints so we shut them off completely. Although, there was a decent amount of natural daylight coming in on one side as it was completely glass. This helped bring up the ambient level at least on one side. For the few wide shots we had, we pretty much lined the opposing side of the laundry mat with Kinos to bring up the fill side and for tighter shots we tented various sections of the windows to create contrast and shape/control the natural light coming in while supplementing with Kinos for back-lights and fill.
 One of the shooting locations that I thought came out really well was an awesome top floor apartment building overlooking the ocean. On the scout I was really concerned about the high contrast and being able to retain the detail of the ocean out the windows while getting enough exposure on the talent inside. We ended up gelling the windows with ND9 and then keying with kinos through light grid. Everything looked great, you could see the beach and the ocean through the windows and we had nice exposure on the talent as well. This was another scene I was really glad we had the EPIC for as its dynamic range really helped out. We also shot a really cool bike chase scene from the back of a van and were able to catch some great sunset shots down at the beach. Overall it was an ambitious shoot with a tough shooting schedule but it felt good that my regular crew was cool enough to come on board and make this happen with me. As always, I'm excited for the next one.
 Through the month of April into May I shot a feature called "A Way Around." The last feature I shot was a documentary, so I was pretty excited at the opportunity to once again return to the world of long form narrative. "A way Around" is a road trip movie that chronicles two characters as they travel from LA to Salt Lake City, Utah. The Cannon 5D, being the workhorse of the low budget indie wold, was the directors camera of choice and there was very little wiggle room in the budget for me to suggest otherwise. I have had mixed feeling about DSLRs from the beginning of their rise around 2009 but I figured this was a good project for me to finally take the plunge and see what the 5D was capable (and not capable) of doing. My friend and fellow D.P Matt Roe had shot a feature previously on the 5D and was a solid resource as I prepped for this one. I had shot small pieces on DSLRs in the past and was familiar with the 5D but it was still a bit nerve racking to dive right into shooting a feature on one. I knew the limited dynamic range would be one of the biggest issues I would be dealing with so choosing the right picture profile was really important. The good thing about jumping into the world of DSLRs late is that there are a TON of articles/screen tests/comparisons online that millions of other film makers have posted in regards to DSLR film techniques. Matt had suggested using "Marvels" profile as that was what he used on his 5D feature. I looked at technicolor's profiles as well as "Flaat"and a few others but settled with "Marvels" as it seemed to be a good happy medium. Matt had warned me and I had also read to stay away from overly flat profiles because banding can occur when stretching the waveform while coloring, resulting in loss of information. "Marvels" lifted the black values slightly without creating an overly flat image. I also used "highlight tone priority" on wide day exterior shots and select shots that I could not control all of the highlights properly. This setting helped retain more information in the highlights without significantly altering the mid tones. It worked well, but I used it sparingly in case it was degrading the image quality at some level.


